Validating Enterprise Wi-Fi CertificatesUpdated 3 months ago
Introduction
The main 5S® tenant Wi-Fi network at Icehouse is:
Ice 5S Main
The main 5S® tenant Wi-Fi network uses an enterprise-grade security protocol known as WPA-EAP. This protocol includes a digital certificate to prove the identity of the OpticWise 5S Authentication service. See "Enterprise Wi-Fi Authentication and Certificates" for more detail on those subjects.
This security protocol allows you to be assured that you are connecting your Wi-Fi clients to correct Wi-Fi network (as verified by the verifiable "fingerprint" of the underlying authenticating server), and prevents connections to an impostor network by the same name, which could attempt to steal user credentials or spy on your communications.
Note: Users should never just click accept (or connect) on new certificate warnings, because these might be generated by an impostor network. Always follow the validation steps below.
Users (or their company IT administrators) must validate this OpticWise 5S Authentication service certificate and mark it as trusted for EAP use on devices on the first connection to the network (and whenever the certificate is replaced every few years). OpticWise will send proactive notification emails when certificates are soon to be replaced.
We recommend users pre-accept the new certificates before they are activated, so that they won't be surprised by a certificate validation request when they arrive onsite and don't yet have Internet access.
Companies using Mobile Device Management systems to centrally manage Wi-Fi client devices are encouraged to push new certificates out to clients as soon as they are announced.
Validating Certificates
When a Wi-Fi connecting device detects a new certificate that is not yet trusted, it presents some details of the certificate for the user to inspect and either validate or reject. OpticWise recommends users validate the certificate details (different devices show different details, see the specific examples below).
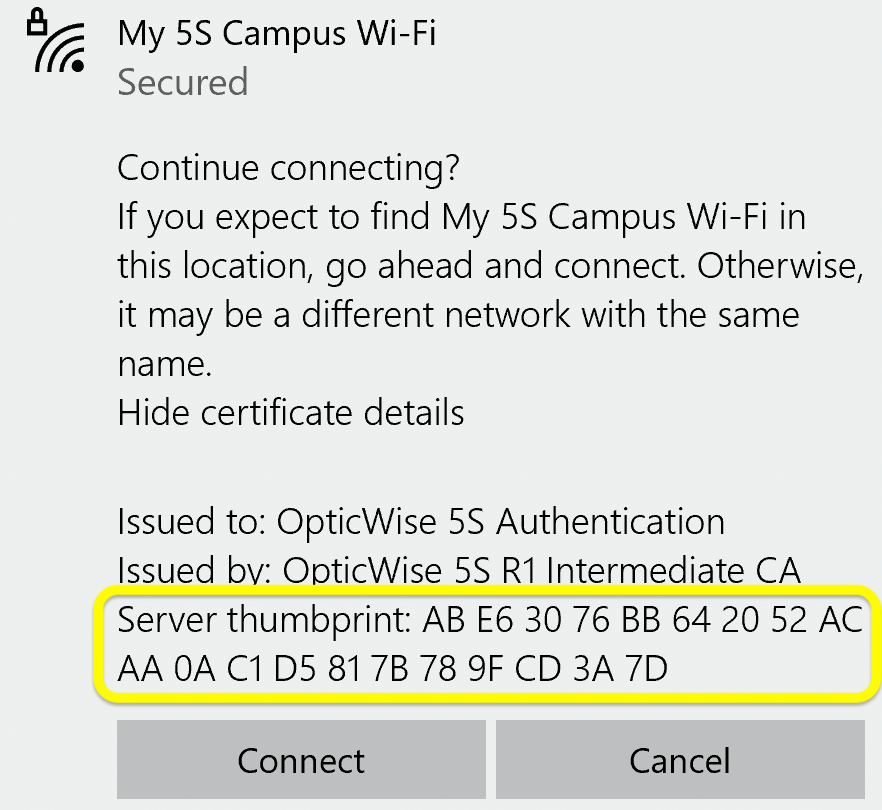
If your client shows these details, verify that the certificate expires on Feb 1, 2030, and was signed by the OpticWise 5S R1 Root CA through the OpticWise 5S R1 Intermediate CA.
Next, verify any fingerprints that your device shows for the OpticWise 5S Authentication certificate. This detail is the most critical. The following sections explain where to find the fingerprints for common device types.
Your device should show at least one or two of the following types of fingerprints. Some devices refer to these as thumbprints:
| SHA-1 | AB:E6:30:76:BB:64:20:52:AC:AA:0A:C1:D5:81:7B:78:9F:CD:3A:7D |
| SHA-256 | 3B:9A:FE:3F:BE:76:26:45:78:48:E6:85:31:7D:61:50: 94:7D:23:84:28:4F:3A:BF:7B:61:D1:93:1C:76:2A:67 |
| SHA-512 | 17:B4:41:46:5B:DA:BA:A2:E3:D5:29:06:39:F2:DC:00: EE:F6:BC:A7:75:9A:C8:1E:27:3D:86:E6:AA:10:D6:7B: A6:2F:13:C6:0E:E5:4F:E3:0C:AA:3A:F0:0C:1F:21:B6: C5:18:C4:72:1B:06:4C:B5:10:2E:23:2D:ED:EC:29:6F |
If your device shows a fingerprint that does not match any of those shown in this table, do not accept the certificate or mark it as trusted. In this case we recommend you take a screenshot and provide it to your staff IT admin, site admin, or OpticWise support.
Once you've verified the fingerprints, you can accept the authentication server certificate as being trusted on your device.
You may notice that your device does not trust the root or intermediate certificates. On current versions of Windows and macOS, there is no security advantage to trusting the root or intermediate certificates, so we recommend that users or IT administrators not do so for those platforms. You only need to verify and trust the OpticWise 5S Authentication server certificate.
However, on Google and Android systems, it is necessary to trust the root certificate (see below).
Device and Operating System Examples
The following examples show what to expect when validating the certificate on common devices and operating systems.
Microsoft Windows 10/11
Windows client currently show only the certificate name, intermediate certification authority name, and the SHA-1 fingerprint of the certificate, but not the expiration date. Even this abbreviated amount of information is enough to validate and trust the certificate.
Select your main tenant Wi-Fi network:
Enter your username (email address), and your personal strong password:

Examine the certificate's fingerprint. Especially notice the last few characters, which should be CD 3A 7D:

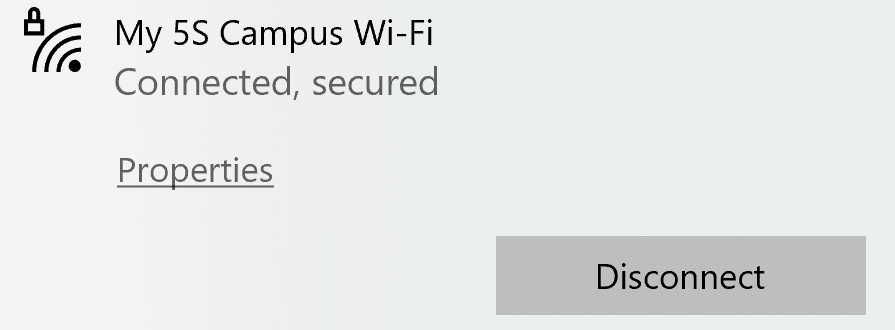
Click "Connect". You are now connected to your main tenant 5S® Wi-Fi network, and the status should show "Connected, secured":

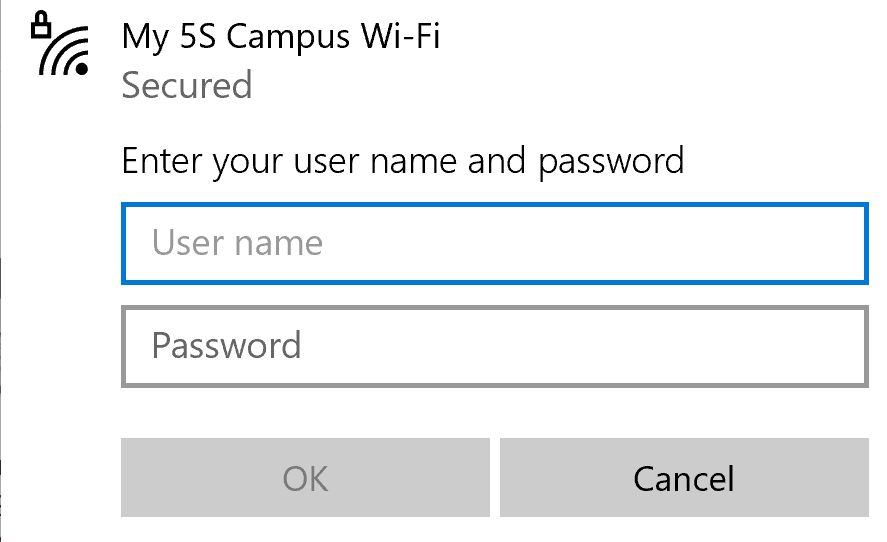
Apple macOS
Select your main 5S® tenant Wi-Fi network, then enter your username (email address), and your personal strong password:
Apple macOS shows the following dialog to allow you to verify that you are connecting to the legitimate main 5S® tenant Wi-Fi network, with authentication provided by the OpticWise 5S Authentication server:
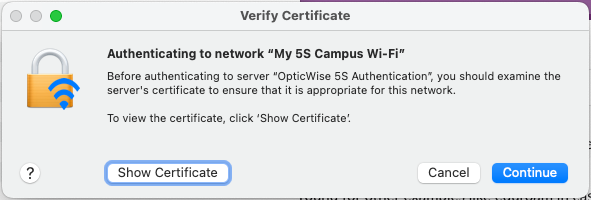
Click "Show Certificate" to examine the certificate:

Expand the "Details" section, then scroll down to the bottom "Fingerprints" section:
Confirm that the SHA-256 and/or SHA-1 fingerprint matches what is shown above (i.e. focus on the last 6 or so characters), and if so, click "Continue" to accept/install/trust the certificate on your Mac computer.
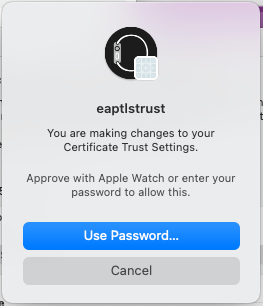
Depending on the security settings on your Mac, you may be prompted with a dialog box like this requesting your approval to install the certificate:
Click "Use Password" and enter the password you use to login to your Mac. Note that this is NOT asking you for your Wi-Fi password.
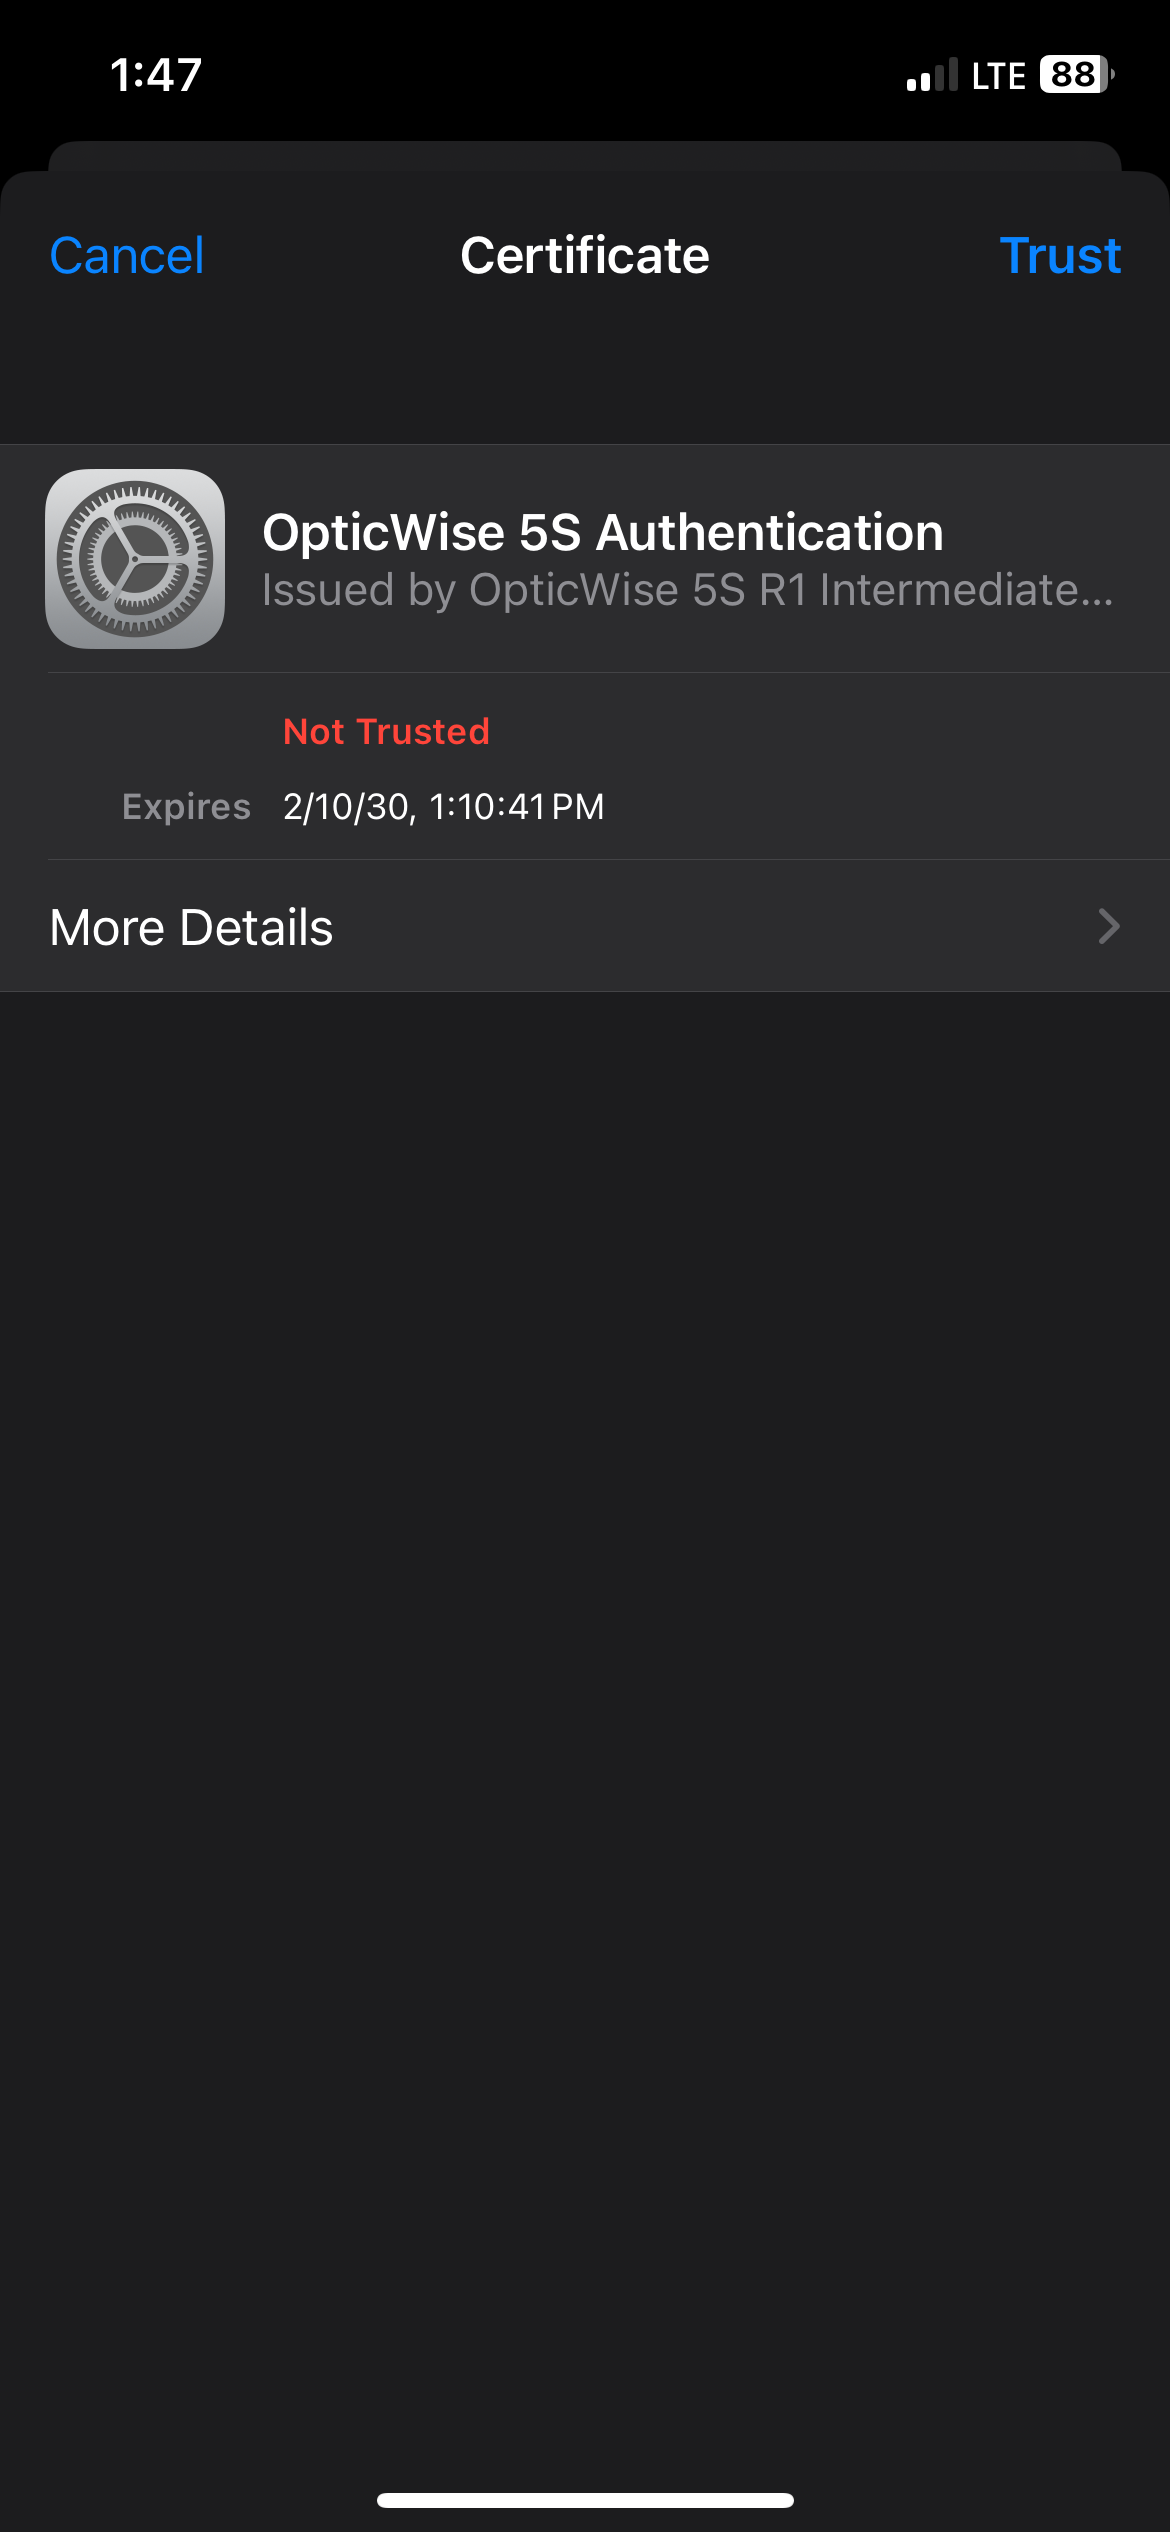
Apple iOS
Select your main 5S® tenant Wi-Fi network, then enter your username (email address), and your personal strong password:
Apple iOS shows the following dialog to allow you to verify that you are connecting to the legitimate main 5S® tenant Wi-Fi network, with authentication provided by the OpticWise 5S Authentication server:

Click "More Details", then scroll to the bottom of the page to find the Fingerprints section. Verify the fingerprints exactly match the values shown below. The fingerprints are the most critical detail to verify.
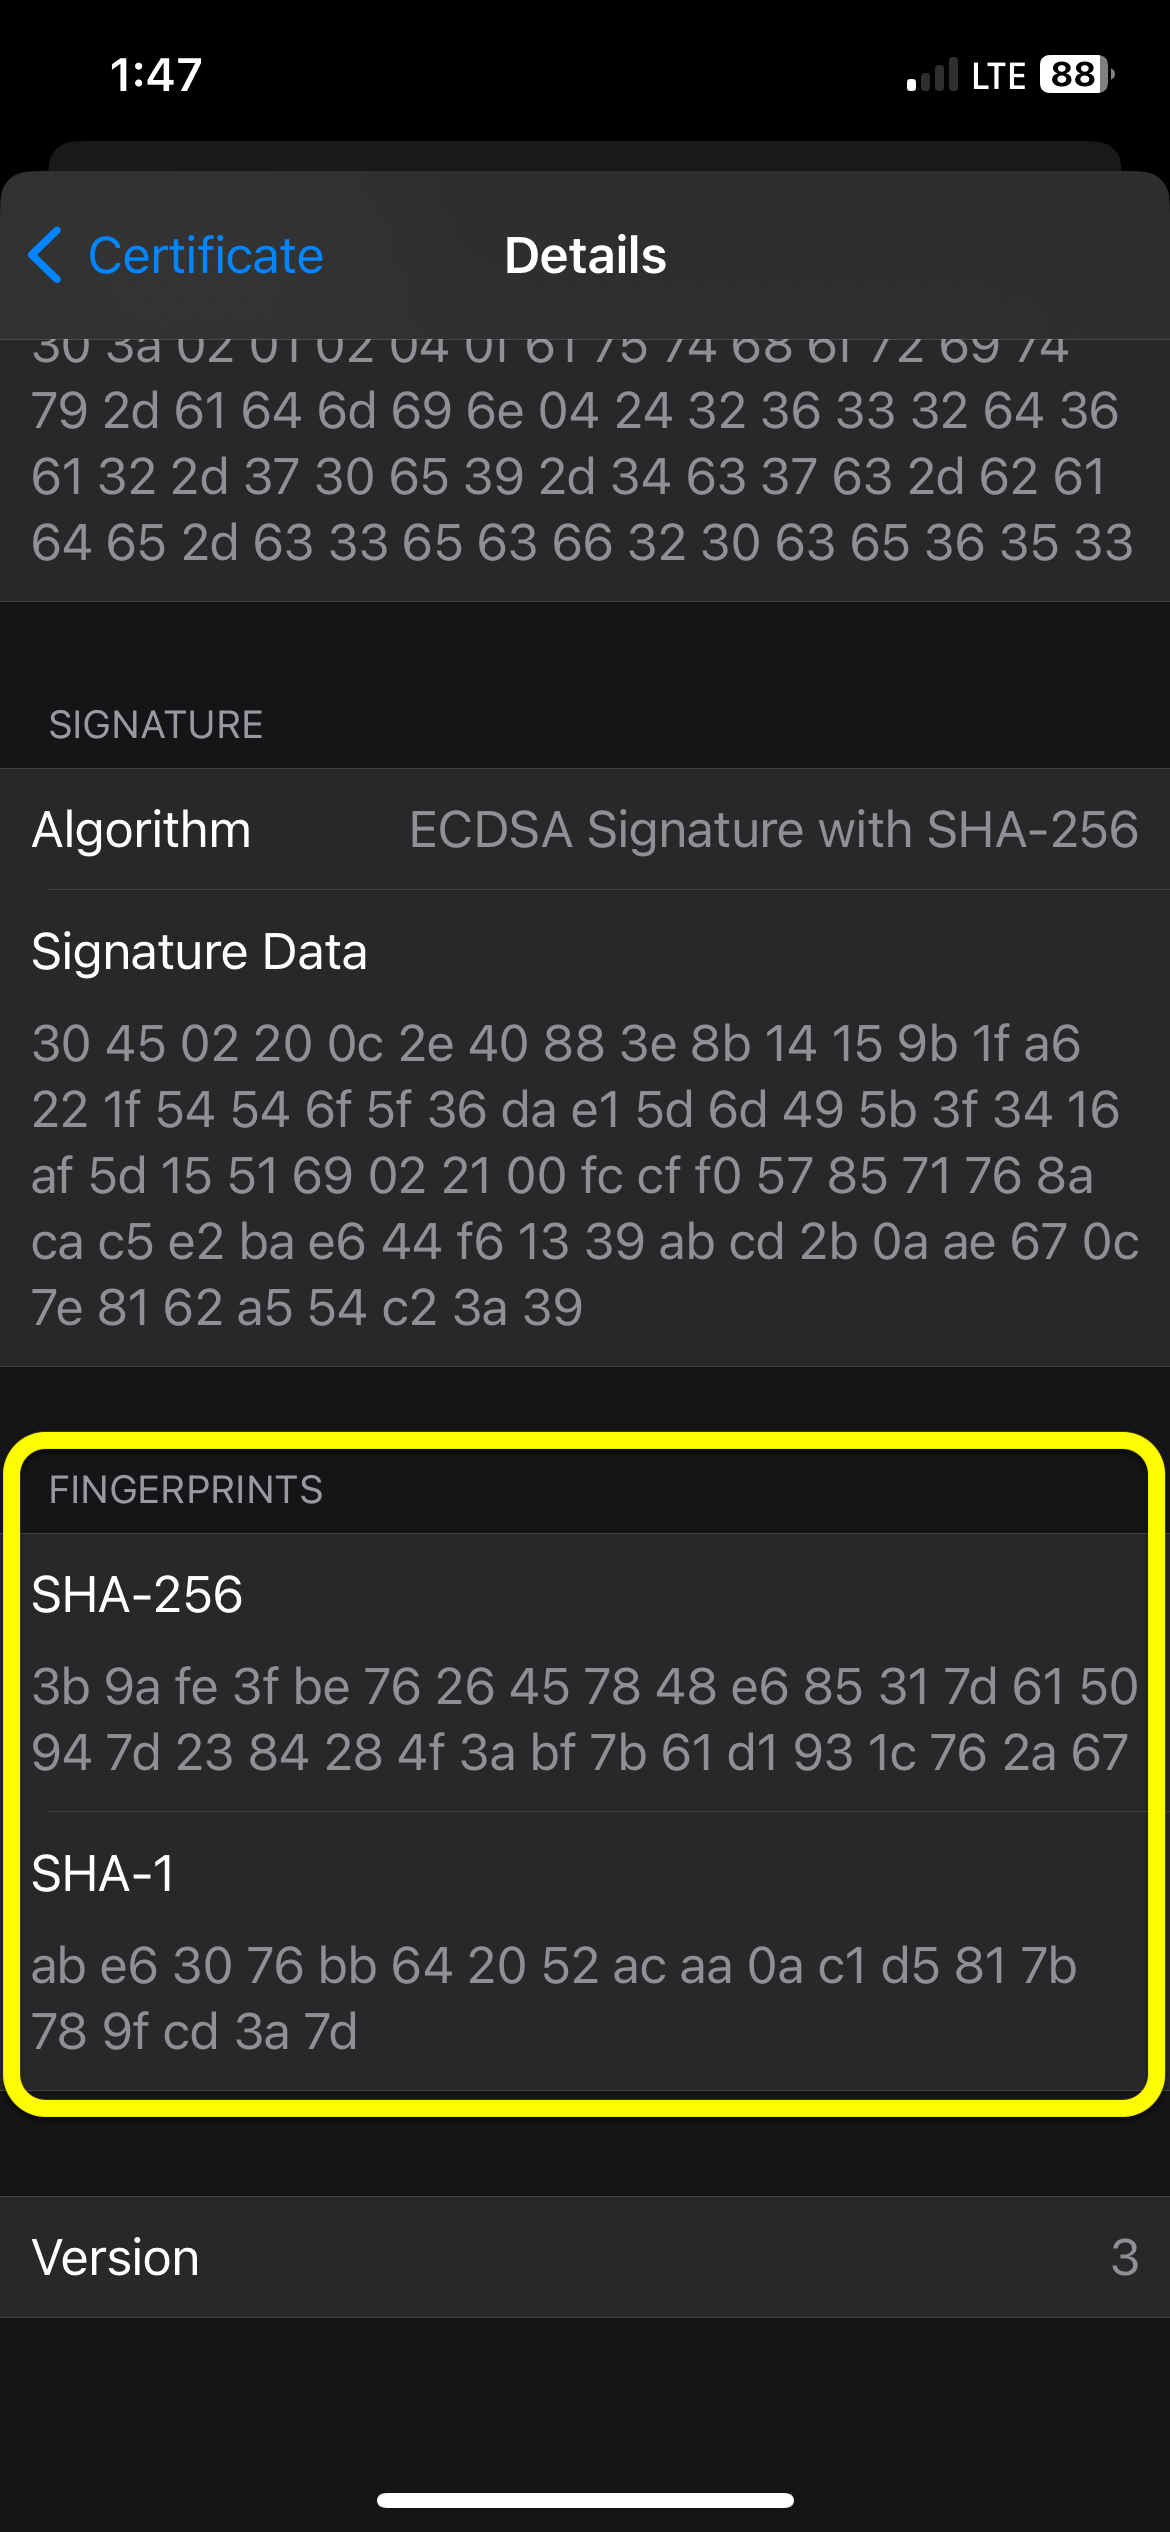
If the fingerprints you observe match the fingerprints shown above, click the < Certificate at the top of the screen to get back to the main Trust page, then click Trust.
Google ChromeOS
Download and install/trust the certificate
- From the Chrome browser, download the OpticWise 5S R1 Root CA certificate to your local storage.
- At the top right corner of your Chrome browser, click the three vertical dots to access the Customize and control Google Chrome menu
- Click Privacy & security, then Security, then Manage Certificates
- Click the Authorities tab
- Click on Import, then select the opticwise-5s-r1-root.crt that you just downloaded
- Click Open
- For Trust Settings, check the boxes for Trust this certificate for identifying websites
- Click OK
Join the Wi-Fi network.
- Select Settings > Network, then select the main 5S® tenant Wi-Fi network
- For EAP Method, select EAP-TTLS (not EAP-TLS)
- For EAP Phase 2 Authentication, select PAP
- For Server CA certficate, seleect OpticWise 5S R1 Root CA
- For Identity, enter the email address for your account
- For Password, enter your personal strong password that you previously set on your account
- Slide the Save identity and password bar to the right to enable the setting
- Select Connect
Android Phones and Tablets
Joining Android devices is more complicated than with other operating systems, and due to the customized choices that different manufacturers and service providers make, it's simply not possible to delineate all of the paths involved in setting up WPA2-Enterprise username-based Wi-Fi authentication.
For example, you might be able to preemptively download the OpticWise 5S R1 Root CA certificate, review it, and trust it for your connection. Or you might have to choose "Trust on first use" for the certificate setting, or some manufacturers might only allow you to choose CA Certificate = None.
For these reasons, we recommend that you instead onboard your Android device as a trusted IoT Device (in the 5S® portal), then join it to the IoT Wi-fi network. For more information, please refer to the "Android MAC Address Randomization - Private Address" help center article.